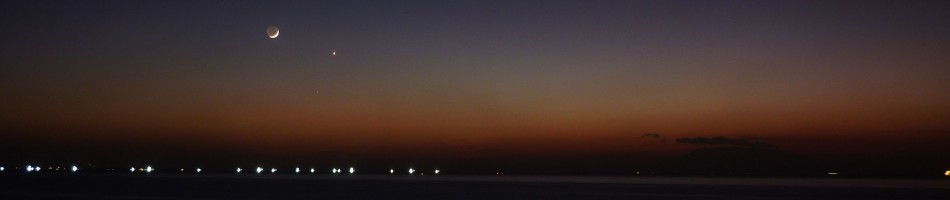
Moon, Mars and Antares – October 18, 2012
A few minutes after sunset last October 18, 2012, two reddish objects were found near the waxing crescent Moon (12% illuminated) in the western sky. These two bright red objects were actually the planet Mars, and the bright star Antares in the constellation Scorpius. Mars was about 2 degrees to the upper left from the Moon, and Antares about 4 degrees to the lower left from Mars.
Mars and Antares are often mistaken for each other because of their similarity in appearance. In fact, the name Antares means “Rival of Mars” in Greek.
All photos were taken using Canon Powershot SX40 HS. Some if the images were blurry. My camera got out of focus and i didn’t notice till it was too late! 😦
Click on the images to see larger versions.


The sky was extra clear that night. Amazed by the beauty of the starry night sky, I took my camera out again and snapped this photo while walking home:

Meet Algorab, my Panasonic Lumix FH2 Digicam
I just bought my first digital camera that I could use in taking photos of the night sky. 🙂

Algorab, my Panasonic Lumix DMC-FH2
It was a 14-megapixel Panasonic Lumix DMC-FH2 digital camera which I named Algorab. (For astronomy enthusiasts, the name came from Delta Corvi, the most notable star of Corvus, which simply means ‘The Crow or Raven’ in Arabic. It is is a double star, 3.1 and 8.5 magnitude, pale yellow and purple, on the right wing of Corvus.)
The Panasonic Lumix DMC-FH2 is a ultra-compact digital camera with an effective resolution of 14.1 megapixels. The lens offers a 35mm-equivalent range from a useful 28mm wide angle to a 112mm telephoto and features a true optical image stabilization system with which to fight blur caused by camera shake.

Crepuscular rays | image taken using Algorab
The main reason why I bought this camera is because of its long exposure capability (up to 60 seconds). Long exposure times permit the camera to gather enough light to take a quality photo, even in the darkest of environments like the night sky. If you want to keep the noise levels low and use lower ISO levels in dark environments long exposure times can be very useful. Most people don’t normally need to take very long exposure photos, but they can provide an amazing creative opportunity for amateur astronomers. For example you can take long exposure shots of the night sky to capture the movement of stars across the sky, capture night-time vistas, landscapes at dusk, etc.

Orion over a light-polluted area
I’ve already used a previous model of Panasonic Lumix before and I got amazed when I first learned about its impressive feature. FH2 compared to Lumix FS7, however, has significantly better wide angle (28 mm vs 33mm) meaning it can capture around 20% bigger view. FH2 also has more than 10% larger sensor and has a slimmer compact body (0.7″ vs 0.9″).
Moreover, this model can also record 1280 x 720p High Definition (HD) video.
Another feature that I love about this camera is its Intelligent Scene Selector which allows its user to select the best option from Macro, Portrait, Scenery, Night Portrait, Night Scenery and Sunset by detecting the environment.
Overall, this budget product is excellent for its affordable price. It has a well balanced performance for a point and shoot; it’s easy-to-use, has good image quality and it contains certain features that are typically found on higher end products.
I’m really excited to use it to take images of the upcoming planetary conjunctions. 🙂
Clear skies!
Night Sky Gazing in June
In the Philippines, the rainy season usually starts in the month of June and runs through about November. During this period, thunderstorms and typhoons which generally affect a wide area (sometimes half of the archipelago) are common. In fact, only this June three typhoons (namely Dodong, Egay and Falcon) have already visited the country along with heavy rains.
Clear skies were seldom visible for most of the month of June was so stormy. Hence, having an opportunity to spot this season’s prominent constellations during clear nights was really a blessing to an amateur astronomer like me. 🙂
The sky was moonless on the first week of June. So I took this chance to set up the tripod and the Panasonic Lumix digital camera to get nice constellations images. Thanks to Aaron Misayah for loaning his camera to me. 🙂
The Lumix camera features a ‘starry night’ scene mode — a setting which allows you to capture long exposures, with 15, 30, and 60 second shutter speed options. I selected the 60 sec exposure and point to regions of some of my favorite constellations.
Note that the Lumix didn’t have ISO control when in starry night mode. If I set the camera to manual mode (where I do have access to the ISO settings), I don’t have access to the exposure time. The longest exposure time I have in manual mode is 1/8 seconds. But after I looked at the pictures in manual mode (ISO 1600, 1/8 seconds exposure), I notice that there are a lot of noise. I think they’re trying to hide the fact that the Lumix is very noisy in high ISO mode so they made it not selectable when you’re using long exposures.
Anyway, below are some of the photos I took from our residential area in San Jose del Monte, Bulacan. I used Photoshop to add the constellation lines.
1 June 2011
camera settings: 6mm, f/2.8, 60 sec. exposure time, ISO-80

- Bootes – 12:01 AM


- northwestern sky


- Scorpius – 12:30 AM

Zooming into the photo above will reveal vertical streaks (not the star trails). These unnecessary streaks have occurred because I forgot to use the self timer on the camera for this shot. By clicking on the shutter button, even a slight vibration from the finger would create blur on the picture, even when you are using a tripod.
5 June 2011
camera settings: 6mm, f/2.8, 60 sec. exposure time, ISO-80

- Leo and Leo Minor – 9:23 PM


- Corvus – 9:27 PM


- Big Dipper – 9:54 PM

By the way, I am living from a suburban site. The limiting magnitude for such a location is frequently close to 4 . This means that the apparent magnitude of the faintest star that could be visible to the unaided eye is about magnitude 4.
The original images were a bit darker but I increased the brightness and contrast in the post processing to find out the dimmest star recorded. I found that every star that was visible with the naked eye was in the image, which is good! The results of each shot have actually far exceeded my expectations. I never thought that a little humble compact camera could go a long way.
I have also tried using this camera in shooting landscape and scenery pictures and it also produced good results. Click here to see my previous post about it. At about 30-45 minutes after the sunset, the sky is not completely dark yet, but the colour appears to be more intense with traces of natural light still available. It would also be nice to take sky photos during this time.
Perhaps, this could be an interesting camera at a truly dark sky site. I have yet to try that when I still have the opportunity. 🙂
Clear skies!
Sunset, Contrail and the Thin Moon
I and my friend Bea Banzuela were walking around the Academic Oval of our university last May 5 when we noticed the sunset behind the trees at the lawn.
The transition of the bluish sky into crimson during this time of the day is always lovely to look at.


- Reeds!


- PHOTO OP! That’s me posing in front of the setting sun 🙂 Haha!

I remembered that the 2-day old thin Moon will set just before the Sun that afternoon. I checked Stellarium for its location in the western sky and waited until it became visible.
We soon found it hanging below a contrail a few minutes after the Sun had disappeared from view. It was around 5% illuminated and barely visible to the naked eye.

- Luna appears against the crimson-colored sky. Click on the image to see the hi-res version.


As the sky grew darker, the Moon become more apparent, along with the bright stars located around it.

A stunning sight! The Moon with its 'ashen glow' (or earthshine) beside Aldebaran


- Staring at the beauty of the night sky

We were grateful that we had along with us a nice point-and-shoot Panasonic Lumix DMC camera which works great when used for landscape photography. Using its starry sky mode, we were able to produce the images above even with minimal light. This setting allows for 15, 30 and 60 second exposures that is best for night sky photography. Other cameras often produce very dark images unless there is some amount of light out. (Thanks to Aaron Misayah for lending us his camera.)
I hope the sky would always be this clear. 🙂